Controls
There is no key-rebinding screen yet, so this is the complete list. One rule is worth internalising before the rest: right-click is always a command and never opens a context menu, anywhere in the game.
The arrow keys always pan. Plain W A S D pan with the setting "WASD pans the camera" on, also with ships selected; engage-on-sight is E, so panning never changes a fleet's stance.
Camera
The galaxy is bigger than the screen. Panning and zooming are the two things you will do most.
| Alt+W/A/S/D | Pan the cameraHeld, not tapped. Plain W A S D are build grid keys on your planet; they pan only with the setting "WASD pans the camera" (Settings, off by default). With that setting on, plain W A S D pan everywhere, also with ships selected, and the build grid's W A S D tiles take Alt instead. Ignored while Ctrl is down. |
| ↑ ← ↓ → | Pan the cameraIdentical to WASD, and free of the command-key overlap. Not while the empire overview or a system view with planets of yours is open: there Up / Down move the row cursor. |
| Shift | Pan three times fasterHeld together with any pan key. |
| Mouse wheel | Zoom in and outZooms toward the cursor, not the screen centre. Zoom far enough into a system and each planet starts reporting its own numbers. |
| Middle-drag | Drag the cameraCancels camera-follow if a ship was being followed. |
| Mouse to screen edge | Edge-panRamps up the closer you get to the edge. Can be turned off in Settings. |
| Double-click a star | Zoom into that system |
| F | Follow the selected shipPress again to release the camera. |
| Enter | Jump to the current battleSame as clicking the battle banner. With several fights running it follows whichever the banner is showing. |
| Home | Home planetOne press pans the camera to your home planet's system, keeps the zoom and selects the planet, so its build menu shows. Twice quickly (or once more when the camera is already there) zooms in and opens its planet view. Home always goes to the home planet, whatever F1 holds; with the home planet lost it goes to your most populated planet. (Until 0.73.0 every press zoomed in; Backspace did this too until d16-2.) |
| F1 | Bookmark 1 (starts at your home planet; Ctrl stores, Shift resets to home)Bookmark slot 1. At the start of a match it holds your home planet, so it does what Home does: one press pans there with the zoom kept and selects the planet (its build menu), twice opens its planet view. Ctrl+F1 stores the selected planet or star (nothing selected: the camera view) in it, as Ctrl+F2-F12 do; Shift+F1 brings back the home planet, never an empty slot. Its chip "F1 Home" (with a small house while it holds home) leads the bookmark chips. (Until d17-11 F1 was always the home planet.) |
| Backspace | Up a levelFrom a planet view to its system view (zoom unchanged), from a system view to the planet list (I) with that star's planet highlighted, and from the planet list back to the map. Enter goes down again: a row of the list or of a system view opens its planet. |
| Ctrl+← / → | Step through the eventsCtrl+Left walks back through the last 40 events, Ctrl+Right forward. The camera pans to each one and keeps its zoom. Lines that had faded come back on the right, stacked below each other (the newest at the top, one more line per step back), the event you are on lit; a few seconds after the last step the stack fades and the normal list returns. Mouse: the wheel over the event lines, the small ▲ / ▼ beside them, or a click on a stacked line. N goes to the newest. |
| Ctrl+F2-F12 | Bookmark the selected planet or starSaves the planet whose view is open, else the star whose system view is open, into that F key (replacing what it held). With nothing selected it saves the camera view: position and zoom. A chip for each bookmark shows beside the fleet group chips. |
| F2-F12 | Go to a bookmarkThe camera pans there and keeps its zoom, as F1 does; a planet is also selected, so its planet view (on your own planet: the build menu) shows at once. The same key twice quickly (or once more when the camera is already there) opens the planet view (a star: the system view; a view bookmark: its saved zoom). Clicking a bookmark's chip does the same; a double-click opens it. A key with no bookmark says so. |
| Shift+F2-F12 | Clear a bookmark |
| . | Your next planetThe planets in "Needs you" first, then the rest; Shift+. steps back. Opens the planet view without changing the zoom. |
| , | Your next idle colonizer, scout, miner or freighterSelects it without changing the zoom. |
Selecting things
Left mouse selects. It never issues an order — that is always the right button. Rest the mouse on a ship on the map for its hull, damage a second, gun range, speed and sight (an enemy's: only what you have seen); the fleet panel and the build buttons' tooltips show the same numbers.
| Left-click | Select a star, planet or ship (a planet on the map opens it, as its row does)A star opens its system view, with a row per planet. A planet opens its planet view: click its row in the system view, or the planet itself on the map (zoomed in far enough to see it). On empty space, clears the selection. Zoomed out, clicking a fleet blob takes the whole cluster rather than one hull. A selected cruiser or capital ship of yours shows its firing cone: a faint wedge out to its weapon range, the only directions it can fire. |
| Hover a ship | Its numbers: hull, damage a second, gun range, speed, sightRest the mouse on a ship on the map. Your own ships show all their numbers; another player's only its type and hull, and only once you have seen it. The fleet panel shows the same for the ships you select, and a build button's tooltip for the hull it builds. |
| Left-drag | Box-selectTakes every ship you own inside the box, starbases excepted. |
| Click the same star again | Cycle through the ships in orbitStar, then each ship type in turn, then back to the star. |
| Double-click a ship | Select every ship of that type on screen |
| Tab | Cycle the fleet by ship typeWith a star selected it steps through the types in orbit; with a fleet selected it narrows to one type at a time, then back to the whole selection. |
| Alt+1/2/3/4 | Select your fighters, frigates, cruisers or bombers on screenAlt+Shift adds them to the selection. Selects only; it never gives an order. (Ctrl+1-4 until the fleet groups took Ctrl.) |
| Ctrl+1-9, 0 | Save the selected ships as fleet group 1-0Replaces what the group held. Starbases, platforms, outposts and hubs are never in a group. A chip for each group shows above the bottom panel: its number, the glyph of its most common ship and how many ships it has. |
| 1-9, 0 | Select fleet group 1-0The same digit twice quickly moves the camera to the group (the zoom stays). Ships that died drop out of their group. Clicking a group's chip does the same; a double-click on it moves the camera. |
| Shift+1-9, 0 | Add the selected ships to fleet group 1-0 |
Giving orders
Right-click is always a command, everywhere in the game. It never opens a menu. What it does depends on what you have selected and what you clicked.
| Right-click empty space | Move thereSeveral ships form up in rows by role around the point, facing the way they travel: fighters in front, scouts and support behind them, then frigates and capitals, cruisers and bombers at the back. On arrival they turn to that facing, a fighter's guns with it. |
| Right-click a star | Move, colonize, bomb or mineRead from the selection: a colonizer settles, a bomber attacks a populated enemy world, a miner picks the richest world it can work, anything else flies there. A move never warps with the Gameplay setting Right-click: Ctrl = warp (the default); with Right-click: Auto it warps when that is quicker. Colonize, bomb and mine orders warp when that is quicker either way, unless other ships are selected with them: then the whole selection follows the click (a plain right-click flies, Ctrl or the Warp button warps). |
| Ctrl+Right-click | Warp to a star or a pointThe selected ships warp there, also where flying would be quicker (only a point inside the system a ship is in is flown to). Warping is four times interplanetary speed but starts with a stationary spin-up, and a hit during the spin-up cancels it. A warp drops out at the edge of every star system on its way and spins up again by itself, and it takes the quickest route there by itself. Ctrl + right-drag warps the fleet to its formation line. The Warp button in the fleet panel arms the next right-click the same way, for play with the mouse only: it stays lit for more legs while Shift is held, and with the Move button lit too the order is a Move by warp (Esc cancels). |
| Ctrl+Shift+Right-click | Queue a warp legAppends a warp to the queue. Warp legs in a row are flown as one warp: the ship turns at each waypoint at warp speed, with no drop-out and no new spin-up; only a star system on the way stops it. A plain Shift + right-click between them is flown (the warp drops out before it). |
| Hold Ctrl | Show the warp rings and routeWith your ships selected, holding Ctrl shows every star's warp zone ring and the warp route to the star or point under the mouse: its stops, spin-ups and arrival time (whatever the Map display settings say). |
| Alt+Right-click | Move, no stoppingA plain Move to a star or a point: the ships keep their course and only fire, in passing, at what comes into their guns' reach; they never stop, turn or chase on the way, and a hit during a warp spin-up restarts it instead of stopping the ship. On arrival they are ordinary idle ships. The order line is dotted with » before its end; the fleet panel says (no stopping). Alt + Ctrl + right-click is a plain Move by warp, Alt + Shift (and Alt + Ctrl + Shift) queues one, Alt + right-drag draws the formation line as one, and Alt works on the minimap too. While Alt is held the previews draw dotted. The Move button in the fleet panel arms the next right-click the same way (Esc cancels). |
| Right-click an enemy Trading Hub | Attack the hub stationWith warships selected, a red reticle marks the enemy hub station under the cursor; the right-click orders them to destroy it. Ships never shoot a hub on their own. Capturing its planet takes the hub over instead. |
| Right-click a planet | Act on that specific planetSame intent rules, but aimed at the one world instead of the system. A warship right-clicked onto a planet takes up a geostationary orbit. A colonizer right-clicked onto one of your own colonies reinforces it: its 50 colonists and 100 minerals land there, up to the planet's population cap (hover the planet for the preview; refused at the cap). |
| Shift+Right-click | Queue a waypointAppends to the current orders instead of replacing them. Chains as far as you like. Ships fly a smooth curve through the points (a chain of points, flown or warp, and a patrol loop; a single move stays straight). Holding Shift with the mouse on a star shows the queued legs' routes and the new one. |
| Right-drag | Draw the formation's front lineWith two or more ships selected, drag a line on empty space: it is the front row, and the fleet faces away from it to the left of your drag (left to right faces up; drag back to flip it). The line's length sets how wide the fleet stands: short = narrow and deep, long = wide and shallow. While you hold the button, the line, an arrow and a ghost of each ship in its slot follow the cursor (a cruiser or capital ship also shows where its firing cone will point); on release the ships take the slots and turn to the facing on arrival. Shift appends the formation as a waypoint. With one ship selected, the drag moves it to where you pressed and it faces the way you dragged (an arrow shows it); a drag that starts on the ship turns it where it stands. |
| Right-click with a star selected and no ships | Set a rally pointShips built at that star inherit the route. Shift extends it into a multi-leg path; right-clicking the rally target itself clears it. |
Fleet commands
These act on whatever is currently selected.
| E | Toggle engage-on-sightOn by default for every ship. Turn it off to walk a fleet past a fight instead of into it. |
| C | Toggle auto-colonizeColonizers only. They pick their own targets rather than waiting for orders. |
| Q | Arm Move (no stopping)The same as the Move button in the fleet panel: it lights up, and the next right-click is a Move that keeps its course, fires only in passing and never stops to fight. Press Q again (or Esc) to cancel. Alt + right-click gives the same order at once. Without ships selected, Q stays a build grid key. |
| V | Arm WarpThe same as the Warp button in the fleet panel: it lights up, and the next right-click is a warp (Shift keeps it lit for more legs). Press V again (or Esc) to cancel. Ctrl + right-click gives the same order at once. Without ships selected, V stays the build grid's fourth tab. |
| R | Return to orbit (miners)The selected miners that are mining stop and wait in orbit of their planet, as the Return to orbit button does. Without ships selected, R stays a build grid key. |
| P | Arm patrolA patrol is a route every ship on it follows. P shows all your routes on the map (the one under the cursor lights up): right-click a route's line and the selected ships fly to the nearest point on it and carry on along it (Ctrl or the Warp button lit: they warp there). A route ends when its last ship leaves it. Or right-click for a two-point patrol, or Shift-right-click several times for a closed loop: the patrol starts at the first click and each Shift-right-click adds a point; a plain right-click adds the last, P or Esc just stops adding. Hold Ctrl on a click (or light the Warp button) to make that leg a warp leg: warp legs in a row loop as one warp, with no spin-up at the patrol points (a star system on the way still stops it, and it goes on by itself); flown and warp legs may mix, drawn blue and amber. With Engage ON a warp patrol drops out exactly when the same ship, idle with Engage ON, would go for an enemy (an enemy ship within 400 px of it or of the ships close around it), then carries on; the enemy must be seen by your other ships, planets or scanners (a ship in warp sees nothing). A fight never ends a patrol: 3 s after the last enemy left its weapon range, the patrol goes on with the leg it was on. Press P again to cancel a running patrol; the Patrol button in the fleet panel does the same as P. |
| Drag a route point | Move a patrol route's pointSelect a ship on a patrol: its route shows a small square on each point. Drag a square with the left button and the point moves there; every ship on the route follows at once (a ship flying to that point turns to its new place, a warp in flight bends). A drag that starts off the squares is the box selection, as always. |
| Click a route's line | Add a point to a patrol routeWith a ship on a patrol selected, a left click on its route's line (a small plus marks the spot) adds a point there. The ships take it on their next lap; a ship on that leg that has not passed the spot turns to it. A two-point warp patrol stops flying an oval once it has three points. A ship under the cursor still wins the click. |
| Right-click a route point | Remove a point from a patrol routeWith a ship on a patrol selected, a right-click on one of its route's squares removes that point; a ship flying to it goes on to the next point. A route keeps at least two points: on a two-point route the right-click does nothing. Editing works when no order button and no patrol arming is lit; any ship on the route can be selected to edit it. |
| Fleet panel: Routes | Route spacing, Save route and the Routes listWith a ship on a patrol selected, the fleet panel's Routes column sets how the route's ships space out: Free (each flies on its own), Together (at a point the ships wait until the last one has caught up, then fly on as a group) or Spread (at a point a ship waits until the ship ahead is an even share of the loop away). Save route names the route: a saved route stays, faded with "0 ships", when its last ship leaves. The list shows every saved route: click its name to show it (its ships selected, its points ready to drag), Join sends the selected ships onto it, the cross deletes it (ships on it fly on; it ends with the last one). No key: these are buttons. |
| L | Hold positionThe selected ships stay where they are in a fight: they fire at whatever comes in range but never chase, and fighters dogfight only in a small zone round their place and fly back to it when it is clear. A move order still moves them; they hold again where they stop. Press L again to release them (the Hold button in the fleet panel does the same). A small shield marks a holding ship. |
| X | Auto-explore (scouts)The selected scouts explore on their own: each flies to the nearest star you have not explored yet, then the next, until none is left (then it waits for orders). Stars marked Don't explore (the button on the star's line in its system view) are left out, and with the Gameplay setting Auto-explore: skip known enemy starbases (on by default) so are stars where you have seen an enemy starbase or platform. Any new order ends it; the Auto-explore button in the fleet panel does the same as X. Without ships selected, X stays the build grid's support-ships tab. |
| J | Keep formationThe selected ships' group orders arrive together: the slowest ship sets the pace and the faster ones slow down to match; across a warp the faster ships wait before spinning up, so the fleet drops out as one. On a straight move the fleet keeps the spacing it has and travels as one block, each ship keeping its place (a line drag gives it a new shape); the whole block stops where it is when a ship gets an enemy in range or is hit, and finishes its move together once the fight is over. A ship that gets its own order drops out of step. Press J again to turn it off (the Keep formation button beside Hold does the same). Three amber dots on the order line show a fleet moving in step. |
| Esc | DisarmBacks out of patrol or build arming, and unlights the Move and Warp buttons, without issuing anything (a patrol already given its points keeps running). (V, the warp arming, is gone: Ctrl + right-click or the Warp button warps.) |
| B | Send the selected colonizer to the best free planet, or arm a Constructor's buildDepends on the selection. With a colonizer selected, the map numbers the three best free planets you know of; B sends it to number 1, the same as the fleet view's "Send to best" button (the one key that gives an order; a colonizer wins in a mixed selection). With only Constructors selected, B is the fleet view's "Build outpost" (or "Build platform") button: the next right-click picks the spot, a preview shows whether it may stand there. Esc disarms. Without arming, a right-click moves a Constructor like any ship. |
Map overlays
Overlays paint information straight onto the map. They only ever show what you have actually scouted: live values where you have vision, dimmed last-known values where you have been before, and nothing at all where you have not.
| O | Ownership washOn by default. Tints each system in its owner's colour with a territory bubble. Stacks with the others. |
| M | MineralsThree bars per world — concentration, remaining lifetime reserve, and minerals sitting on the surface. |
| G | SettlementThree bars — habitability, maximum population, current population. |
| Y | Ship-count badgeOn by default. A plain count of identifiable combat ships in orbit, red if any of them are not yours. Stacks with the others. |
| U | Scan ringsOn by default. Draws how far each of your sensors actually reaches. E until d11-3 (E is a build grid key now). |
| T | Trading network overlaySteps quiet / full / off; quiet is on by default once you have a Trading Hub. Links between your hubs (thicker = more bandwidth), chevrons showing which way minerals flow, minerals in flight as dots when zoomed in, blocked links red and dashed. Full adds bandwidth, freighters and each hub's link range. Also in the Map menu (the map layer button in the top bar) and on its own top-bar button. |
| Ctrl+T | Network window of the open planetWith your planet's view open: the planet's trading network setting (Supply / Balanced / Demand and the Demand target), what it keeps, the Trading Hub, its links, freighters − / + and the idle pool. Also a click on the Network line in the planet view's Details (the gear). Esc or the ✕ closes it. |
Building
Every planet has its own build queue. Ships need a starbase at that star before they can be queued at all. The planet view's build grid has its own keys, the Beyond All Reason way: they work while your planet's view is open and no ship is selected.
| Z X C | Build grid: pick the categoryZ buildings, X support ships (scout, colonizer, miner, freighter, Constructor kits), C warships. V is a free slot. Only with your planet's view open and no ship selected; with ships selected C is still auto-colonize and V warp. |
| Q W E R A S D F | Build grid: queue the item on that tileThe top two rows of the grid, as the tiles show them. Shift queues 5, Ctrl 10 (as many as your free supply holds). With "WASD pans the camera" on, the W A S D tiles take Alt. A click on a tile does the same; a right-click removes one of that item from the queue. |
| Shift / Ctrl+click a grid tile | Queue 5 or 10 from the build gridClick queues 1, Shift 5, Ctrl 10, clamped to the free supply and the planet's caps. Right-click a tile removes one of that item from the queue. |
| Shift+click a build button | Queue five at onceWorks for structures and ships alike. |
| Shift+click a queued item | Cancel all of that typeA plain click cancels one. Cancelling refunds what was paid. |
| Shift / Ctrl+click | Queue 5 or 10 ships from a system view rowIn the row's Ship menu: click queues 1, Shift+click 5, Ctrl+click 10, as many as your free supply allows. |
Game and window
| Space | Pause and unpauseThe only rebindable action in the game. In multiplayer only the host can pause. |
| Esc | Back out, one layer at a timeCloses the panel view, then disarms, then unfollows, then deselects, then zooms out to the galaxy, and finally opens the in-game menu. Esc in the in-game menu closes it again. With Settings or the key list open, Esc closes it and goes back to where you opened it from. |
| Mouse back button | Back out of the bottom panelThe thumb button on the side of the mouse, if yours has one. |
| Alt+Enter | Toggle fullscreenWorks in the menus as well as in a match. (F11 until the F keys became bookmarks.) |
| Enter | Hosting lobby: Start the matchThe host's [Enter] Start: only the host starts a network match, once every player seat is filled. Nothing starts when a player joins. |
| Enter | Tutorial: press the card's lit buttonNext on a done card, Got it on a reading card, Next tutorial on the last card. A card still waiting for its goal leaves Enter to the game. |
| H | Controls & HUDEvery key and what the top bar means, during a match. H or Esc closes it. |
| I | Your planets: the empire overviewEvery planet of yours in one list; click a header to sort, a row to select that planet (the list stays open), double-click a row to go there. A row cursor and a small build grid under the list: the keys below. I or Esc closes it. |
| Up / Down . / Shift+. Enter | Empire overview open: select the next planet, Enter goes thereUp / Down move the highlighted row and select its planet as a click on the row does: the planet view and its build grid follow, the camera stays (Settings → Gameplay → Planet list: "Camera follows the selection" makes it follow; the arrows do not pan while the list is open). Enter (or a double-click on the row) goes to the row's planet: the camera centres it. . / Shift+. move the row round the list without opening it. The cursor starts on the first row of the current sort. |
| Z X C V, Q W E R / A S D F | Empire overview open: build on the cursor row's planetThe planet view's build grid keys (tab, item; Shift x5, Ctrl x10) work on the highlighted row through the small grid under the list, whatever is selected. Nothing builds on its own. |
| Up / Down . / Shift+. Enter | System view open: move the row cursor, open its planetIn a system view with planets of yours (and no ship selected): Up / Down move the highlighted row over your planets' rows (they do not pan the camera then), . / Shift+. too, and past the last (first) row . (Shift+.) goes on to your next planet as on the map; Enter opens the row's planet. The cursor starts on the planet whose view was open, else on your first planet there. |
| Z X C V, Q W E R / A S D F | System view open: build on the cursor row's planetThe planet view's build grid keys (tab, item; Shift x5, Ctrl x10) work on the highlighted row through the small grid beside the rows. The row tiles (Mine, Factory, Ship) stay as the mouse shortcut. Nothing builds on its own. |
Minimap
| Left-click | Jump the camera thereWith nothing selected it also picks up the star under the cursor. |
| Right-click | Move order, without moving the cameraShift appends it as a waypoint, same as on the main map. |
Activity feed
| Left-click a pill | Jump to the eventDrops a ping at the location so you can find it again. |
| Right-click a pill | Dismiss it |
| N | Zoom to the newest notificationThe same as a double-click on it. |
Replays and battles
In a match, every battle line in the event log has a ▶ that replays that fight. Every match is recorded: open one from the Replays menu; the keys below the first work while it plays, and its Battles list (left) jumps to each fight. Orders are ignored in a replay.
| Ctrl+↓ | Watch a battle againIn a match: replays the battle you stepped to with Ctrl+Left / Right (else the newest battle) in a small panel in the top-right corner: play, pause, step through it and see who destroyed what. The match keeps running meanwhile. Clicking ▶ on a battle line in the event log, or on a battle in the statistics' Military tab, does the same. The last 20 fights are kept. Its camera follows the fight: only the ships taking part, zoomed in on a small fight. |
| F | Battle replay panel: follow the fight againWith the mouse over the small battle replay panel. The wheel or a drag in it gives a free camera; [F] or a double-click follows the fight again. In the replay viewer, a jump to a battle follows that fight the same way; the Battles list's "Follow the fight" or a double-click on empty space follows again after you moved the camera. |
| Space | Pause or resume the replayThe same pause key as in a match. |
| . | Step one tickWhile paused. |
| [ ] | Slower / fasterFrom 0.25x to 16x. |
| F | Fast mode on or offRuns the match as fast as it will go, without one-shot effects. |
| Home | Restart from the beginning |
| Tab F1 | Switch to the other player's viewYou see what that player could see. |
| V | Reveal the whole mapPress again for the viewpoint player's fog. |
| Click or drag the timeline | Jump to that momentInstant inside the lighter band, the part of the match already analysed. |
| S | Match statisticsIn a replay and on the end screen. Click a chart to jump there. |
| K | Match statistics, anywhereIn your own match it shows your own numbers only. The menu (Esc) has a Statistics entry that does the same. |
| D | Statistics dock on or offA slim strip of trends above the timeline. |
| Esc | Close the statistics, step back, or leave the replayWith the statistics open it only closes them. Then it deselects and zooms out like in a match; at the galaxy view with nothing selected it leaves the replay. |
Debug: spawn ships
Debug keys are tester tools: single player only, while debug mode is on (Ctrl+D). A spawned ship appears in the orbit of the selected star; with no star selected, at the mouse.
| Ctrl+Shift+1-7 | Spawn one of your ships: 1 scout, 2 fighter, 3 colonizer, 4 bomber, 5 starbase, 6 frigate, 7 cruiserA starbase always goes to the selected (or nearest) star. |
| Ctrl+Alt+1-7 | Spawn ten of that ship (no starbase)Ctrl+Alt+1-4, 6, 7. A ten-ship squadron of the same type, at the same place as one. |
| Shift+J / G | Spawn a miner (J) or a freighter (G); with Ctrl, ten |
| Shift+E | Spawn an enemy fighter; with Ctrl, tenA fighter of the other player, to have something to fight. |
Debug: planets and minerals
These act on the planet open in the planet view; with none open, on the first planet of the selected star.
| Shift+M | Give the planet 500 minerals |
| Shift+P | Max out the planet: full population, mines, factories and 2000 minerals |
| Shift+C | Make the planet yours |
| Shift+N | Make the planet neutral (nobody owns it) |
Debug: ships
| Shift+T | Move the selected ships to the mouse at once |
| Shift+K | Destroy the selected ships; with a star selected, its starbase |
| Shift+I | No ship takes battle damage, on / offBoth players' ships. |
Debug: vision and players
| Shift+V | Lift the fog: see every star and planet |
| Ctrl+Shift+F1 | Play as the other player (press again to switch back)Single player only. |
| Ctrl+A | Show what the computer player is thinking (AI overlay), on / offDebug mode only. |
| N | With the AI overlay open: the next computer player |
Debug: time
| Shift+F | Hold: the game runs 10 times faster |
| Ctrl+Shift+F | The game runs 50 times faster, on / offTo watch a computer-only match play out. |
Debug: panels and drawing
Which panels debug mode shows: Settings, Debug tab.
| Ctrl+D | Debug mode on / offIn a networked match: this player's own network diagnostics (observe only). |
| Shift+B | Hide the debug panels, or show them allDebug mode stays on. Shows every panel, also the ones switched off in Settings. |
| Shift+H | A short list of the debug keys under the debug bar |
| Ctrl+Shift+8/9/0 | Draw ship icons (8), engine trails (9), ships (0), on / offFor speed tests. |
| Ctrl+Shift+Y | Next starbase beam look (a message names it)Looks only, not saved. |
Debug: logs and screenshots
Files go to debug_logs in the project, or next to the game's exe.
| Ctrl+Shift+F3 | Write one line of speed figures to perf_log.txt |
| Ctrl+Shift+F4 | Save a screenshot |
| Ctrl+Shift+P | Record 300 frames of speed figures to a fileperf_dump_*.csv. |
| Ctrl+Shift+L | Networked match: network log file on / offNetwork diagnostics only. |
| Ctrl+Shift+T | Main menu: start the old 37-step tutorialSuperseded by the four tutorials in the picker. |
The fleet
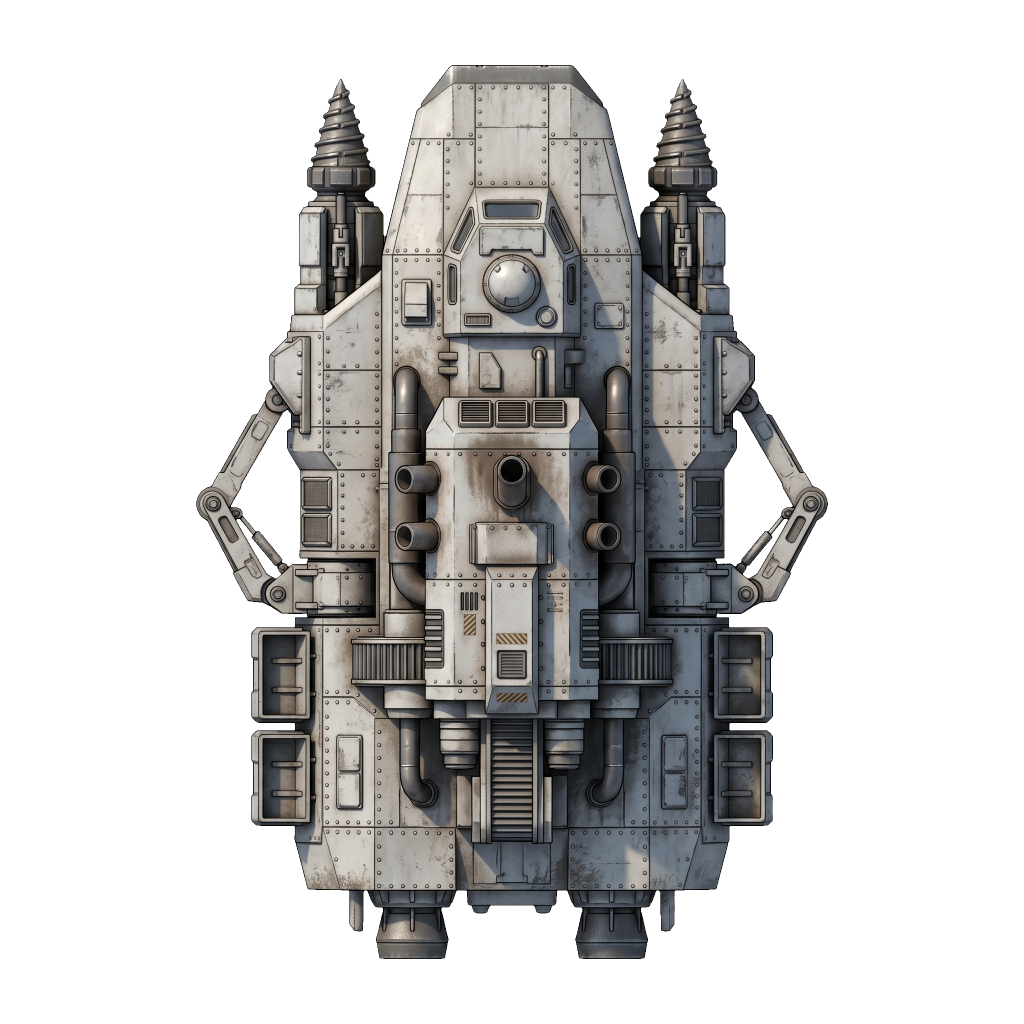
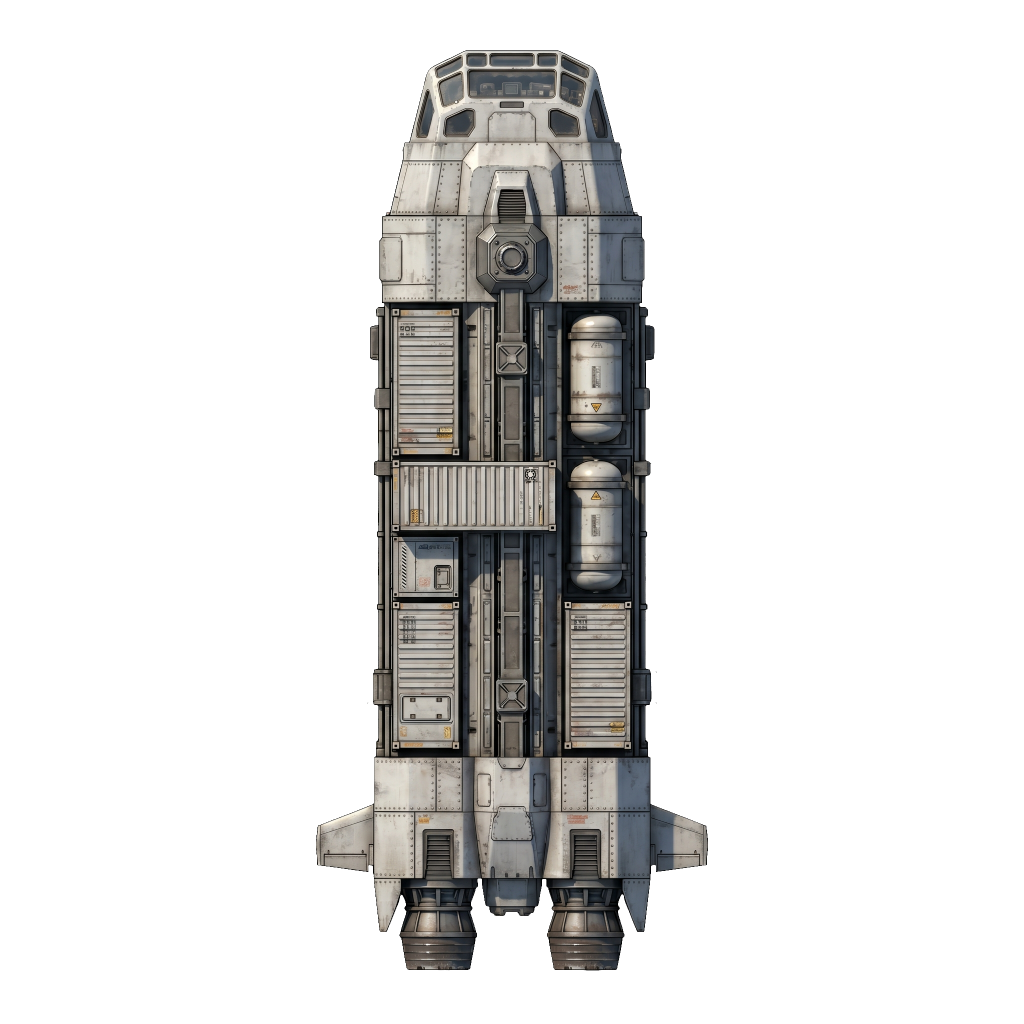
Every hull you can field, with its art and the class glyph it wears on the map. Fighters beat cruisers, cruisers beat frigates, frigates beat fighters (combat rules); the full numbers are in the table below.





Ship statistics
Distances are world units. Move scan is how far a hull spots enemy ships; detail scan is how close it must be to read a planet in full and to identify what an enemy hull actually is. The starbase is built as a structure rather than queued as a ship, which is why it has no build time here.
| Class | Cost | Supply | Build | HP | Speed | Attack | Range | Cooldown | Evasion | Move scan | Detail scan | Warp spinup |
|---|---|---|---|---|---|---|---|---|---|---|---|---|
| Scout | 50 | 1 | 5s | 40 | 100 | — | — | — | — | 600 | 450 | 1.5s |
| Fighter | 100 | 1 | 12s | 180 | 75 | 64 | 0–70 | 0.8s | 12–30% | 80 | 70 | 2s |
| Frigate | 200 | 2 | 18s | 400 | 37.5 | 60 | 0–100 | 0.8s | — | 400 | 262 | 4s |
| Cruiser | 300 | 3 | 22s | 280 | 30 | 80 | 60–360 | 0.45s | — | 80 | 60 | 6s |
| Bomber | 200 | 2 | 14s | 120 | 42.5 | — | — | — | — | 80 | 60 | 3s |
| Colonizer | 200 + 50 pop | 1 | 20s | 80 | 50 | — | — | — | — | 80 | 60 | 3s |
| Miner | 300 | 1 | 24s | 80 | 25 | — | — | — | — | 80 | 60 | 4s |
| Freighter | 250 | 1 | 20s | 120 | 30 | — | — | — | — | 80 | 60 | 3.5s |
| Constructor (outpost) | 350 | 1 | 15s | 100 | 40 | — | — | — | — | 80 | 60 | 3s |
| Constructor (platform) | 300 | 3 | 15s | 100 | 40 | — | — | — | — | 80 | 60 | 3s |
| Capital Ship | 600 | 6 | 40s | 1400 | 22 | 150 | 0–330 | 1s | — | 200 | 150 | 8s |
| Starbase | 400 | — | as a structure | 1000 | — | 180 | 0–380 | 0.7s | — | 200 | 150 | — |
| Defense Platform | 300 | 3 | as a structure | 600 | — | 180 | 0–380 | 0.9s | — | 250 | 190 | — |
| Trading Outpost | 350 | — | as a structure | 240 | — | — | — | — | — | 150 | 110 | — |
| Trading Hub | 600 | — | as a structure | 500 | — | — | — | — | — | 100 | 75 | — |
What each hull is for
| Class | What it is for |
|---|---|
| Scout | The best sensor package in the game and the only mobile source of full planet detail. Unarmed, fast, and cheap enough to lose. |
| Fighter | Cheap autocannon swarm. Dodges a quarter of what is thrown at it and closes inside a cruiser's blind spot, where the cruiser cannot answer. |
| Frigate | Armoured brawler with a heavy sensor suite. Wins the close fight against fighters and spots targets for cruisers that cannot see their own range. |
| Cruiser | Missile sniper. Outranges everything by a wide margin but cannot fire inside 60 units, and cannot see anywhere near as far as it can shoot. — fires only inside a ±60° cone ahead, turning 34°/s (half that standing still). |
| Bomber | Kills population, not ships. Orbits an enemy world and grinds it down; strip a planet to zero and it reverts to neutral, buildings and all. — kills 2 population every 2s. |
| Colonizer | One-way trip. Costs population as well as minerals, and is consumed founding the colony it delivers. — delivers 50 population and 100 minerals, then is consumed. |
| Miner | Extracts minerals into a planet's stockpile at the rate of one fully-staffed land mine. Works neutral worlds as well as your own. — extracts at the rate of 1 land mine. |
| Freighter | Built at a Trading Hub with a starbase and assigned to that hub. Each one adds bandwidth to the hub's links and flies its minerals as convoys; it also collects from your planets and miner sites in range that have no hub. Unarmed. — carries 150 minerals or 50 colonists per run. |
| Constructor (outpost) | Carries one Trading Outpost kit. Press B (or the fleet view's Build outpost), then right-click a point in space: the outpost links into your trading network and collects the planets and miner sites around it. Shot down on the way, the kit is lost. |
| Constructor (platform) | Carries one defense platform kit, built the same way in your own territory: a system where you own a planet, or within reach of your trading network. Holds the platform's supply from the order. |
| Capital Ship | The heaviest warship. Breaks platforms and starbases and beats frigates, but fighters tear it apart, and like a cruiser it shoots further than it sees: give it a scout or frigates. — fires only inside a ±90° cone ahead, turning 20°/s (half that standing still). |
| Starbase | Immobile defender anchored to its planet, and the thing that lets that star build ships at all. |
| Defense Platform | A fixed gun with a starbase's reach, built by a Constructor where you choose in your own territory. One hit kills a fighter. Capital ships break it. |
| Trading Outpost | A small, unarmed relay a Constructor builds in open space: a node of your trading network with half a hub's link range. Enemy ships shoot it like any hull. |
| Trading Hub | The station a Trading Hub puts in orbit round its colony. It pools every mineral in its system and links to your other hubs. It changes owner with its planet, and ships only shoot it on an explicit attack order. |
Structures
Every planet has its own build queue and its own caps. Mines and factories are limited to max(1, size / 2) each, so a small world runs out of room long before a large one.
| Structure | Cost | Build | What it does |
|---|---|---|---|
| Mine | 40 | 4s | Extracts minerals from the planet's concentration. Needs workers to run at full efficiency. |
| Factory | 80 | 8s | Adds to the planet's production rate, which is how fast its build queue advances. |
| Starbase | 400 | 30s | Required before this star can queue ships at all. One per star. Also fights — it is the toughest thing in the game. |
| Scanner I | 400 | 16s | Fixed sensor array on the planet it is built on. Sees further than any ship you own. |
| Scanner II | 1600 | 32s | Requires Scanner I, and replaces it on completion. Roughly doubles the reach again. |
| Trading Hub | 600 | 30s | At any own colony, one per system: puts a hub station in orbit that pools the system's minerals and links to your hubs in range. Freighters are built where a hub and a starbase stand together. |
Sensors
Two ranges matter, and they are not the same number. The first is how far you detect that something is there. The second is how close you must be to read a planet's real figures, or to tell a cruiser from a freighter. Only scouts and star-mounted scanners grant the second one.
Warp and sight. Nothing sees in warp; sensors come back over 1.5 seconds after a drop-out; every ship sees the planets within 150 of it; scouts see far. An enemy that drops out of warp inside your scan shows its hull at once.
| Sensor | Sees ships within | Full planet detail within |
|---|---|---|
| Scanner I | 700 | 350 |
| Scanner II | 1500 | 750 |
| Scout (best mobile sensor) | 600 | 450 |
Economy formulas
All of these run per planet, once per economy step (twice a second). Nothing here is per system — a five-planet system is five separate economies.
| Quantity | Formula | What it means |
|---|---|---|
| Workforce | population / 2 | Only half your population works. The rest are dependants. |
| Building efficiency | min(1, workers / (buildings x 10)) | Every mine and every factory wants 10 workers. Below that they run slow. |
| Maximum population | size x 10 x (habitability / 100) | Size sets the ceiling, habitability sets how much of it you can reach. |
| Mine and factory caps | max(1, size / 2) | Per planet, not per star. A small world runs out of slots fast. |
| Miners per planet | floor(size / 10) | Extra miners sent to a full world contribute nothing. |
| Minerals per economy step | (mines x mine_efficiency + miners) x concentration / 100 | Land mines and orbiting miners both feed this. The game shows it per minute (120 steps). |
| Production per economy step | factories x factory_efficiency + population / 200 | This is how fast the build queue advances. The game shows it per minute (120 steps). |
| Lifetime minerals | 2 x size x concentration | Everything a planet will ever yield. Mining faster does not mine more. |
| Population growth | pop x 0.00428 x (hab / 100) x (1 - pop / max_pop) | Fastest at half the cap; it stalls as the world fills up. The planet view draws this curve with a dot where the planet is: growing (below 35% of the cap), peak (35-65%), slowing (above 65%); the planet list and the system view mark each planet's phase. |
Combat rules
| Rule | Value | Detail |
|---|---|---|
| Miss chance | 20% | Flat, before the target's evasion is rolled. Only scouts and fighters have evasion. |
| Engagement range | 400 units | Ships within this distance of each other form one battle. |
| Warp speed | 4× normal | Preceded by a stationary spinup. Taking damage during spinup cancels the warp. |
| Warp arrival | 350 units out | You always drop in at the edge of a star, never on top of it. |
| Warp stops | every star on the way | A warp that would cross a star's 350-unit zone drops out at its edge, spins up again by itself and warps on; a hit during any spinup stops it there. A warp order takes the quickest route by itself (straight, bent round a zone or star to star). A [Ctrl] warp is always a warp; with Right-click: Auto a plain right-click warps only when that is quicker than flying. Queued warp legs in a row stop only at stars, never at their waypoints. |
| Firing cones | Cruiser ±60°, Capital Ship ±90° | These hulls fire only at targets inside a cone ahead and turn it slowly (cruiser 34°/s, capital ship 20°/s; half that standing still). Frigates, starbases and platforms fire all round. A fleet caught side-on or from behind is silent until its guns come round: face the threat (a formation drag) and hold the line. A selected ship shows its cone on the map. |
The counter triangle
- Fighter beats cruiser — closes inside the cruiser's 60-unit minimum range, where missiles cannot fire.
- Cruiser beats frigate — outranges the frigate's 100-unit reach by 3.6x and kites it.
- Frigate beats fighter — armour and damage per shot beat the fighter's evasion in a close brawl.
Galaxy sizes
| Map size | Stars | Play area |
|---|---|---|
| Small | 16 | 6000 × 6600 |
| Medium | 24 | 9000 × 9900 |
| Large | 36 | 12000 × 13200 |
Stars are never generated closer than 720 units apart, and are drawn from a pool of 30 names. Each star holds two to six planets.
Match rules
| Rule | Value | Detail |
|---|---|---|
| Simulation rate | 20 Hz | Fixed. Host and client run the same tick from the same seed. |
| Economy step | 0.5 real seconds | 10 ticks. Population, mining and production advance 2 times a second. |
| Match length | 30 minutes | If nobody has won by then, whoever holds the most stars wins. With the stars even, the higher score decides: planets, then population. Level on all three is a draw. A domination hold still running at that moment plays out first (overtime, up to 2 minutes). |
| Domination | 60% of stars for 2 minutes | Reach that share and keep it: the top of the screen counts the hold for both players. Dropping below it before the time is up resets the count. |
| Supply cap | 120 per player | Every ship takes supply, from the moment it is ordered until it is gone. A ship that no longer fits cannot be ordered. Starbases are free. |
How a match ends
- Elimination — a player with no stars and no colonizer left is out. The last one standing wins.
- Domination — hold 60% of the stars in the galaxy for 2 minutes. Both players see the count at the top of the screen; lose a star and drop below the share, and it starts again.
- Timeout — at 30 minutes, whoever holds the most stars wins. With the stars even, the higher score decides: planets, then population. Level on all three is a draw. If a domination hold is still running then, the match goes into overtime (up to 2 minutes): it ends when the hold completes or is broken.
AI opponents
Difficulty changes how the Brain plays, not what it is allowed to do. At every level it runs on the same public commands you do, pays for everything, and sees exactly the same fog of war: it cannot read your position through it. It builds a starbase at a star it captures, so it holds what it takes.
Easy and Normal are weaker because they play like a less attentive player: they give fewer orders a minute, so they build in spurts and leave minerals unspent, and they show their attacks coming. Hard is the Brain at full strength. The descriptions below say how each level plays.
- Easy — Gives about 12 orders a minute, so it builds in spurts. Keeps one fleet style, gathers in view for 30 seconds before it attacks and leaves your home alone until 12:00.
- Normal — Gives about 33 orders a minute. Gathers in view for 15 seconds before it attacks and adapts its fleet a minute after it sees yours.
- Hard — The reference Brain at full strength. Attacks whenever it expects to win, scouts every target, adapts at once.
Network ports
| Port | Notes | |
|---|---|---|
| Game traffic | UDP 7777 | The host must have this port reachable. Forward it for play over the internet. |
| LAN discovery | UDP 7778 | The host broadcasts once a second. Joiners on the same network see the game in the list without typing anything. |
| Players | 2 | One host, one joiner. The host is authoritative and pauses for both. |
The walkthrough for actually getting two people into a match is in the guide.